Tuesday, June 24, 2014

Farmhouse Desk

This old sturdy desk has been on my 'sprucin' up' list for quite some time. It's a piece that I cherish because it was given to me by an old family friend who is no longer with us. I could never part with it but she needed some fine tuning. When I was in my teenage years, I nothing short of carved (turns out permanent marker does just as much damage as a pocket knife) the names of all my 'sweethearts' all over the top. When I finally grew out of that stage (thank the Good Lord) I painted her white.


I got to work sanding the top piece to ditch all the white paint & years of true love markings.


I picked out an espresso stain - it said 'new' so I figured I had to give it a try. I usually use a walnut stain - which I will likely stick with in the future because only one coat of the espresso & it was still a bit darker than I desired. After the stain dried for an entire day, I sealed it with a layer of polyurethane clear coat. 


The bottom of the desk got another two layers of white paint. I debated sanding it all down & starting fresh, but aside from a few chips the existing paint really wasn't too bad. I would love to do something unique with the handles - thinking some rustic horse shoe pulls - but those are on standby until I commit to an idea I love.

Stay tuned for the 'after' ...

Friday, December 27, 2013

BaByQ Shower


I've thrown a few baby showers in my day, but never a co-ed one! A good family friend of mine, Nikki, requested the men be included in the special day. I figured the best way to get the men to not only want to come, but to (maybe?!) even enjoy themselves, would be to include beer and man-food! Thus, the idea behind the "BaByQ."

The invitations were done with black & red - "bun in the oven, burger on the grill" style. I also included an insert with a new idea where guests bring & sign a book instead of a card. I adore this idea because usually you look at a card once or twice and it gets thrown away. Books are great for children & what better way to start your collection than with ones picked out by your friends & family!?


Of course, a cute invitation can't be lost in an ugly envelope. I went for red envelopes with white lettering. It is around Christmas, and they looked very "Christmas-y" to me which I didn't love but black wouldn't have been very baby-ish... maybe future Christmas card idea ... we'll see.


One of the BEST things about planning this shin-dig in particular ... catering! It took off so much pressure not to have to cook any food. On the menu: all things barbecue! Mac 'n cheese, pulled pork sliders, cornbread, baked beans, and salad. YUM.


The soon-to-be daddy's sister had this picnic style cake made! How cute.


Dessert! I made some red velvet cupcakes with a white cream cheese frosting (& I'll be honest, that recipe was straight from a box) & mini apple pies (which I will never attempt again - ONE large pie would have been so much easier than the multiple mini ones!).


For the cupcakes, I used some white, red, and blue gingham & polka dot cupcake papers. I also used some thick toothpicks and leftover scraps from my pinwheels to make little flags for each cupcake. I'm all about the details.


& speaking of pinwheels! These were probably my favorite detail of the party and SO easy to make! I glued different red & blue papers back to back, cut in squares of varying sizes, cut from each point to the center, gather the corners, hot glue, and add some bling in the center. Wah-lah!
 
 
"It's a boy" banner - made with dark & light blue card stock with blue gingham place holders between words. Strung with red ribbon & finished off with pinwheels on either side. 
 
I added in a little crepe paper - red & white - around the chandelier. I really wanted it all to look baby boy-ish & not 4th of July-ish. Mission may or may not have been accomplished.


Game time - the one game I decided to do for the shower was the "naughtiest thing you've done as a child" game. It's very simple! Each guest gets a piece of paper & writes down the worst thing they remember doing as a child. Without writing their names on the paper, the mom-to-be then has to guess who did what! It actually ended up being very entertaining with both genders present! There are some naughty girls out there! :)
 
I'm so bummed that I didn't take more pictures. Everything looked quite a bit different after we set out the beer bucket, mason jars with red/white paper straws, and of course the catering showed up with the food! Heck, I don't even have a picture of the guests of honor - mom & dad!
 
Nikki & Jason, it was such a pleasure to help you celebrate & "shower" you before the little man comes! We can't wait. If he grows up to be anything like his mommy & daddy, he will be one awesome dude! Hugs.

Friday, November 1, 2013

Elk Camp Dutch Oven Cooking

One of my favorite things to do at elk camp is cook in my Dutch oven. It works great because generally you can make everything in one pot and cook in the campfire as you sit around drinking a cold (or warm!) beverage telling the hunting stories of the day.
 
The following are a few recipes I made this year - some tried & trues, some new -  all delicious! My ingredients and directions are "rough" because I didn't measure a single thing including the cooking times. I added pictures so you could get a rough idea but each recipe turns out a little different each time. Before we leave for the mountains I always freeze the meat for each meal in Ziploc bags & thaw out what I'm cooking for the night after the morning hunt. Most of the recipes also use very similar ingredients to make the shopping/packing easy.


Peppered Beef Stew
 
Ingredients:
Beef (I just cut up some cheap steaks), potatoes, onions, carrots (I used a whole bag of precut baby carrots & cut them in half), celery (the whole thing!), Johnny's seasoning, McCormack's steak seasoning, salt & pepper
 
Directions:
(this first one I made over a camp cooker instead of on the fire because I wanted a consistent slow cook)
Season the meat with steak seasoning and then brown in the pan
Add water to create some broth
Add in potatoes, onion, celery & carrots
(There wasn't enough room in my pot to add all the veggies at once, but as the stew slow cooks and cooks down, I just kept adding things in)
I added quite a bit of salt & pepper (hence the "Peppered Beef Stew"), but season to taste
 
When it tastes good, she's ready!


Chicken Potatoes Gravy Stew
 
Ingredients:
Potatoes, onion, chicken breasts, 2 packets of brown gravy mix, flour, salt & pepper
 
Directions:
Brown the chicken and add in the brown gravy mix
Add some water, potatoes, and onion
You can eat this as soon as potatoes are ready or let it slow cook & turn into a thicker stew by slowly sprinkling in flour as you stir.


 Bacon Jalapeno Potatoes & Boneless Ribs

Ingredients:
Bacon, potatoes, onion, green pepper, jalapeno, ground beef (optional)

Directions:
(This is my brother's specialty dish)
Layer the pan with bacon strips cut in half, then layer with sliced potatoes
After these cook a little, add in onion, green pepper, jalapeno
We happened to have some browned ground beef left over so added that in
Salt & pepper - & yum! it's quite the concoction.

As for the boneless ribs, they are to die for but a secret family recipe!
(aka I didn't make them & couldn't tell ya!)


Chuck Wagon Casserole
this is always a camp favorite!

Ingredients:
Ground beef, Sweet Baby Ray's bbq sauce, large can chili beans, onion, green bell pepper, corn muffin mix, can of corn

Directions:
Mix the box of corn muffin mix with the can of corn, set aside so it can rise a tad (if you're around a fridge full of supplies you can prepare the corn muffin mix according to the directions, but if you're in a use-what-ya-got situation, I've found the can of corn in lieu of milk & eggs works fine)
Brown ground beef, add in onions and green peppers
Add in can of chili beans & whole bottle of Sweet Baby Rays
When the chili like pot of goodness has warmed back up, add the corn muffin mix on top
Cover with coals & when the corn bread is golden brown it's ready to serve!


Bacon Stuff Baked Potatoes & Trailside Beans
 
Ingredients:
Potatoes, bacon, ground beef, chili beans (or whatever kind of beans you have/like), onion, chili powder, chili pepper flakes, Worcestershire sauce, brown sugar, shredded cheese (optional but delicious)
 
Baked Potato Directions:
Cut the potatoes in half, poke with fork, add a slice of bacon, wrap in tin foil
I cooked the potatoes in the Dutch oven
Turn the potatoes often so they are evenly cooked through - when bacon is done they're ready
 
Chili Directions:
 Brown ground beef, (season whenever you'd like to taste with chili powder, chili flakes, Worcestershire, brown sugar etc.)
Add onions, bell peppers if you want, beans (I added chili beans & Pork 'N Beans)
 
When everything is cooked - layer the beans on your potato, top with shredded cheese - enjoy!


Peach Cobbler
 
Ingredients:
Large can sliced peaches, box cake mix, butter
 
Directions:
Drain some liquid out of peaches and spread across pan
Layer with cake mix
Cut butter into tablespoon sizes & layer on top of cake mix
Cover the Dutch oven with coals & bake until golden brown


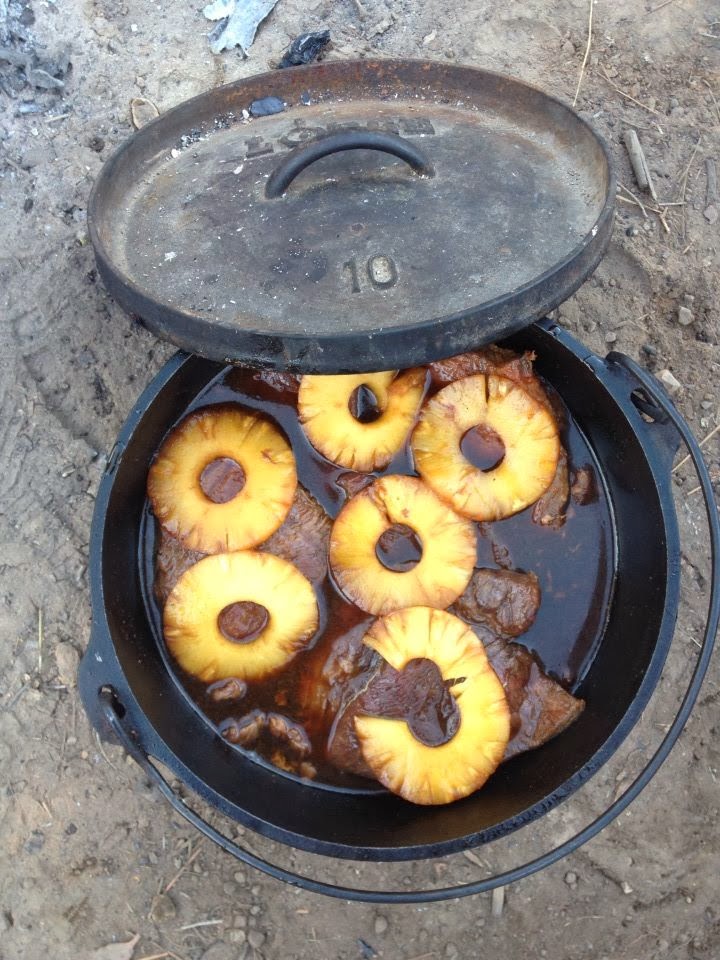
Pineapple Teriyaki Steak

Ingredients:
Steak, bottle of teriyaki sauce, can sliced pineapples

Directions:
Marinate steak in teriyaki sauce
Layer on pineapples
Cover & cook over campfire
Flip steaks as needed


After you cook each meal & are ready to clean out your Dutch oven - slowly boil out anything left in the pan and wipe down with a sponge. When the pot is clean an still warm, add a tablespoon or two of vegetable oil (you can use a paper towel to make sure you cover the sides too). This will keep your oven nice and seasoned & ready for your next meal.
 
Enjoy!

Monday, October 14, 2013

Turquoise & Gray Chair Re-do

This old wooden chair was in need of a little sprucing up!


I started with a coat of white primer (& in typical fashion didn't bother to take the existing seat off first)


Picked out this pretty fabric-


Added a layer of gray paint to match! & wah-lah! Super easy, quick project. I will probably even add another layer of gray paint. At first I thought I liked it a little shabby looking, but it looks a little unfinished to me.


Monday, September 16, 2013

A Fall Pumpkin Treat

With colder days, changing leaves, and burning fireplaces on the horizon I figured I would jump on the pumpkin bandwagon and mix up a sweet treat. Of course, I'm enjoying it on this gorgeous sunny "end of summer" afternoon out on the deck with an iced coffee. 

Pumpkin cream cheese whoopie pies are possibly one of my favorite fall desserts. I would share my "secret recipe" with you but quite frankly it's only a secret because I goggled "pumpkin whoopie pie", picked the easiest one, and didn't quite measure all my ingredients as accurately as a good baker might do. It's also possible I threw in a couple extra dashes of good things like cinnamon and pumpkin pie spice. 

Happy Monday! 


Thursday, September 12, 2013

Mason Jar Taco Salads

I never like eating salads for a "meal" because I'm more of a meat-and-potatoes-give-me-"real"-food kind of a girl. Amidst being so busy lately and always on the go during lunchtime I figured I would try out the mason jar salad craze. 

I made four of them on a Monday night and surprisingly they were still delicious by Friday. 

I cooked up some turkey burger (not typically on my grocery list!) with taco seasoning. Not bad. Then I put it in the fridge so it would cool completely. 

I layered spicy ranch dressing (who knew there was such a thing?!), black beans, corn, turkey burger, tomatoes, onions, and then lettuce. I've read some blogs that tell you not to put meat in them. I didn't have a problem with it. I think adding it to mine is what helped it be so filling. 

Wah-lah! Taco salad! Shake & enjoy! 

Thursday, September 5, 2013

Buh-Bye Student Loans!

As I was thinking about writing this post I realized that I don't even know who (if anyone!) actually reads this blog. I have these wild dreams of having a thousand plus followers but realistically if my mom used a computer she might actually be the only one keeping up with me. It's been a crazy mix of personal stories, design projects, party planning, & everything in between! So for today's post if you are here for the design projects & fun stuff hold tight with me while I share some personal exciting news! Since I'm not married, pregnant, buying a house, or have any other huge life changing event happening ... I have to be excited about other things. Sooo ...
 
TODAY, I PAID OFF ONE OF MY STUDENT LOANS!
wahoo!!!

You might remember when I started reading Dave Ramsey's "Total Money Makeover" book a little over two years back (& wrote this post: Total Money Makeover). Throughout the last couple of years I'll admit that I haven't been the most diligent in sticking to a budget & when I went back to school for my second degree my loans were in deferment (aka I didn't have to pay them). Looking back I wish I would have made more payments during that time because the amount would have gone directly towards lowering the principal and wouldn't have collected any interest. However when the time did come that I graduated (again) & was required to start my loan repayment (again) I always paid 3-4x the amount due on this particular loan.

How did I do it? I increased my income. I started by asking for a raise at my current job. Then, I started working a second job. I pretended as though I wasn't making any more money & instead put it all directly towards the loan. While the second job is only temporary, it gave me more momentum & I was able to make a bigger dent than before.

Whenever I read articles on "how to save money" I usually get bored because they are things I already do - no cable, avoid late fees, eat at home, bla bla. I stopped getting my nails done, going tanning, & cancelled my gym membership. Instead of never going out I pick places to go based on my favorite time - happy hour! I can never say no to spending time with friends so I often suggest to go on a walk instead or invite them over for a bottle of Two Buck Chuck. I patch my old jeans instead of buying new ones. I make sure I only make one trip into town for work & coordinate all my errands to get them done before or after. I stopped buying fancy coffee (everyday) & make it at home instead. I didn't renew my season football tickets (SO SAD about that one) because now living three hours away makes each game that much more expensive to go to! Every little thing adds up.

It would seem that one less monthly payment would mean more money in the bank! BUT, I'm going to follow Ramsey's "snowball" principle of now putting all the money I put towards this loan towards the next one! I didn't really understand the concept of paying off your smallest debt first, but it really does encourage you to keep at it when you reach your goals. It also allows you to pay off the larger debt in less time in the end.

My goal was to have it paid off by December ... and I'm three months early! So this "back-to-school" season, I'm celebrating NOT going back to school & NOT having to pay towards that student loan ever again.& damn! it feels good.

One down, one to go! Time to crunch some numbers & set my next goal.